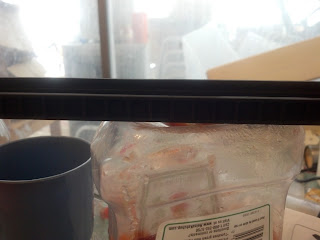
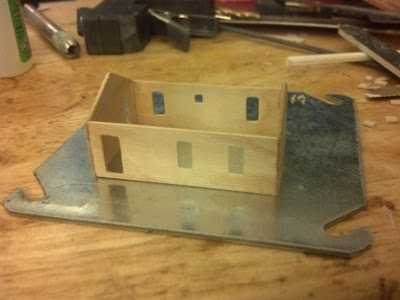
I sweet talked my brother into making me a chopper I saw online.
It works so well, much easier than trying to use a razor blade.
Thanks Bro, love ya.
Rob's N-Scale Railway
Wednesday, March 13, 2013
Sunday, March 3, 2013
Method to my madness
I thought I might explain some of the method to my madness as it was commented to me that I was "All over the board." :-P
I love modeling, I have found that I even love scratch building a model so much more than putting together kits, to me it is incredible to see something come of nothing.
My Railway is not just to have a train to play with but to have an excuse to create models and terrain, it may take a while to get to the point where I can play with the train but it will never ever be "Completed" as there is always something to do, add, modify but that's alright as it gives me something to occupy my mind and hands in a productive way.
In laying out my track I found it very difficult to envision where everything was supposed to go, I had no buildings, I had no bridges and hardly any money, all I had is track and foam, so I was at the craft store picking up something for my wife when I saw their pile of basswood sheets, and sticks and they were cheap so I gave it a try, I made 2 houses of basswood, well mostly made, cats got to one and the other is still floating around somewhere, but they will make place holders so I have an idea of where to put the track, how much room I need to leave for houses and roads, I need to make a couple buildings so that I can do a downtown district as well.
I built a bridge this weekend, it is a girder/deck bridge more modern and I will probably put it more towards the middle of the layout by the city, and am going to do an older trestle bridge further back more in the wilderness/forest area, and maybe some simple stacked bridges here and there in the forest. (where they stack logs criss/cross on top of each other)
I do not like building things around the terrain, I would much rather build the terrain around the objects, or at least have an idea of where it should go, what size etc.
So in that regard is why I have stopped working on laying out the track for the moment and am more focused on building some models to go into the railway to help lay it out in a way that will look the best.
So stay with me if you are interested in watching it grow and seeing what it turns out to be, as I don't even have a definitive idea of how it will all look in the end.
Scale Converter
I got tired of trying to figure out how many millimeters a foot converted to in N-Scale so I wrote a program that will do all the conversion for you.
Change any field and all the others auto update and the scale can be changed, I deal with N-Scale so the default is set to N of course.
This should make scratch building much, much easier.
Change any field and all the others auto update and the scale can be changed, I deal with N-Scale so the default is set to N of course.
This should make scratch building much, much easier.
Scratch built girder bridge
Sunday, February 24, 2013
A new scratch built house, made with plastic parts
Here are some pics of a new scratch built house I have working on, it is created out of evergreen plastic sheets and strips.
I should have taken a picture of the house laid out before being glued together but I didn't.
Here is the corner molding, it is two strips one wider than the other by the amount of their width so they come out to be the same size from the corner.
Here is the start of the molding to go up against the roof.
The house painted, it needs some touch up from handling it fitting the molding on, next time I will wait until all the pieces are cut and temp fitted before painting so I wont have to touch it up.
Some pictures with the molding laying in place but not glued down yet.
The start of the window frames.
Wednesday, February 20, 2013
Here is the link for the plans of the house I am making below, the owner was very kind to post the plans to his house he made, I think his looks awesome.
Section House
Section House
Tuesday, February 19, 2013
A Cricut building
I was working on my house that I was just winging it on and was trying to score roof tiles and siding lines thinking it is a pain in the a** when I had the thought "I sure wish I had a laser cutter" but alas I do not have $2000+ just burning a hole in my pocket (get this a 3d printer $400 a laser cutter $2000+ wtf is up with that? I don't need a 40 watt laser to cut through metal I am cutting 1/32" thick bass wood) so I was thinking again and remembered that I bought my wife a Cricut machine years ago that collects dust, hmmmmm.
I drug it out of mothballs and tried setting it on its most shallow setting and scored a bunch of lines, then set the knife for a deeper cut and then had it cut the sides of the house, I had to set it for multiple cuts but it worked like a dream. Well for that, tiny details turned out badly, more on that in a bit.
As you can see the fine detail cuts did not work so well, the blade pivots when it cuts so that it is always facing the right direction when cutting but that means rounded not so nice cuts, like in the upper right those are supposed to be stair step parts, not so much...
Here is the sides scored and cut out, for this it was amazing, I was not worried about the windows having rounded corners as there will be a window frame around it.
Here are the pictures of it glued together, sorry about the pics being a bit blurry.
I of course could get the fine detail cuts with a laser cutter but......
On the net they have for sale a 2 watt laser diode, the size of it would be about the size of what is in a laser pointer but quite a bit more powerful, it is $70.
There is a video of it cutting through a toothpick, a toothpick is harder and thicker than the material that I am using.... so since the cutting blades fit inside an aluminum holder that is about an inch thick, my thoughts are, buy another holder for $15 drill it out enough for the diode and a lens and I might just get my laser cutter and it would not alter the Cricut at all as it would just be modifying the replacable holder and not actually altering the machine.
More on that dream and the house later.
Subscribe to:
Comments (Atom)


